Wednesday, October 14, 2015

Conversation Pieces Project Reflection

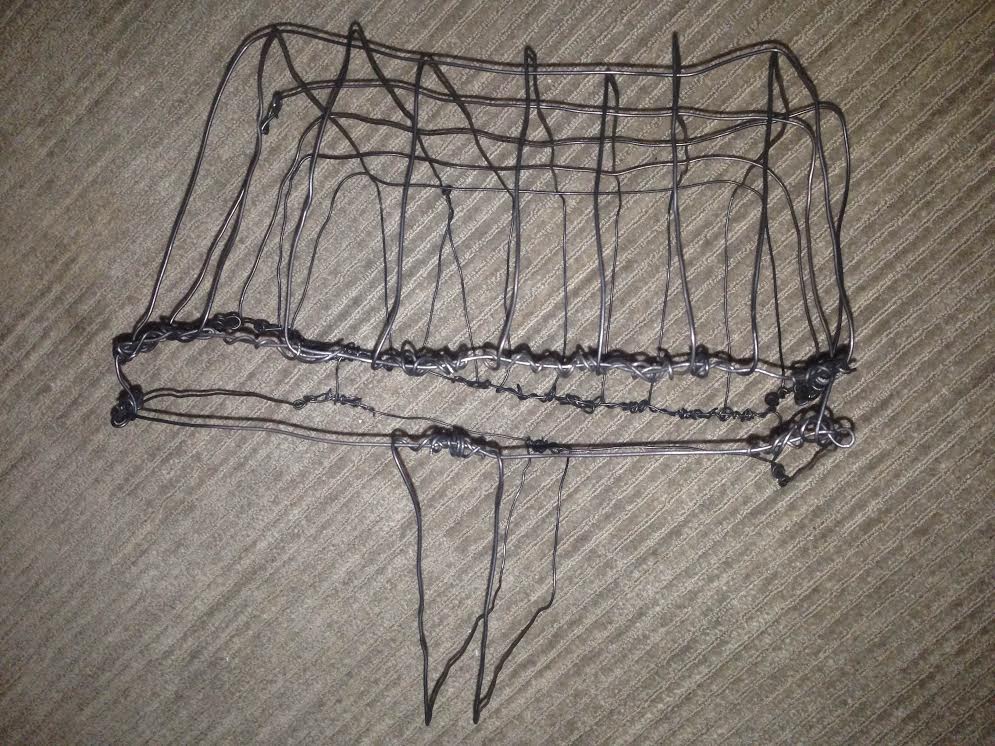
The original idea of this project was to "recreate" a household object using wire. The first part of the project was to create simply the object. The second part would be to create an abstraction piece, which would be the companion to the first piece. This project dealt with the context of shape, construction, and lines in space. 

         The wire as a material was difficult to work with, especially when constructing a basket, which involved weaving, twisting and securing the ends of wires in tight spaces, and straightening the pieces as I went along (which I would say after completing the piece, is a very obvious struggle still displayed). I started the first piece by constructing 3 rectangles, and creating the corners by vertically placing and twisting the pieces into place. This was the basic shape of the piece. I then attached the handle- made by two longer pieces of wire curved over the two longer sides of the baskets. Then came the most difficult part: weaving. I counted out 7 pieces along the length of the basket, with one which split into two smaller pieces on one side. I then counted 5 pieces along the width of the piece, and started weaving. I would say the most difficult part I found when starting the weaving process was making sure to alternate which pieces went under the frame and which pieces went above the frame at the ends, constantly reassuring that two pieces next to each other weren't both above or below, messing up the rest of the weaving process. I made this mistake later along the way when weaving the sides. Making this mistake seized me of much needed, very precious time, that was maybe used chatting with my friend in the studio and disproving the theory of multi-tasking. But of the first piece, the most difficult part would be the side weaving, due to the waste of material and loss of time.

         Onto the abstraction. This piece was a bit more fun, as it was easier. Once I'd learned and had come up with some ideas and techniques for weaving. Using prompts to fabricate ideas and sketches to become 3D companions. Multiple sketches were done, and some groups were even compiled into the final sketch design. Charcoal and Mylar paper were the key components for these sketches. Using prompts such as "to undo", "to reduce/ to dislocate", and "to allude/ to imply" for my brainstorm sketches in particular. My first design highlighted the prompt, "to undo", and would simply lay flat pieces of the basket, and weaving in a more 2D space. This would be done by simply creating 11 rectangles, which would dilate in size, framing each other, the weaving the width and length pieces into the rectangles. The handle would be the only part that was 3D.
However the design I ended up going through with, completed scratched out the idea of dilating the rectangles. The design involved creating 12 same-size rectangles, as well as a base, which would run along the bottom of the escalating rectangles. The base would be a balance and attachment piece for all the weaving pieces to attach to, which I found could be an easier and much quicker approach. Because the length pieces would be woven in a slanted direction, due to the stair-like appearance of the squares, I found it be much easier to place the pieces onto the top, pull the weaving pieces inside or outside the frame of the rectangle and push and secure each rectangle into place. This cut time and looked much better in the final design- from what I think, of course.


         The idea for this project is much like the idea of the masking tape shoe project. It would help the artist to understand what components make the piece. Unlike, trying to make the second piece look like the first, it was completely warped, but techniques to apply to it improved for the second pieces in both designs. The piece appeared as a 3D line drawing in the end. 


100 Objects Body Mantle Project Inspiration

The idea behind this project is to take 100 of the same, non-conventional, objects and make a piece of clothing or accessory using just that object, by attaching all of it together with one source (ex: wire, string, etc.). This project allows nothing under 100 objects, but can exceed 100.


Thursday, September 17, 2015

Shoes: The "good", the bad, and the ugly

least to most ridiculous shoes
Totem pole shoes. Probably the least ridiculous because of what males have been sporting lately.

Ive seen plenty of girls walk just fine in platform shoes. But the colors would suggest otherwise.


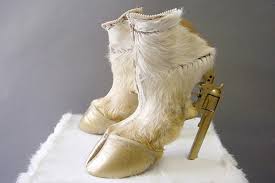
Cosplay shoes? People can walk around and have to stand for more than 12 hours at conventions. If you're willing to flaunt blisters for the next week, then do what you must.


These shoes are only good if you make it to the Nutcracker in the first place. The heels even play music and the ballerina spins inside the heel. 


Shoe Project Reflection


The Sole Of a Shoe
     The idea of this shoe project was to understand the shoe's structure and how it was built. This was helpful for structural design. Designers have to understand how something -in this case, the shoe- is built in order to achieve proper and adequate movement for possible future consumers. 
     I started with the sole by layering 2 pieces of  masking tape. Tracing the soles of the pair of shoes, and pressing the adhesive sides of both together.  4 pieces had to be made for the top and bottom of the sole. for the thickness of the sole, tape was torn and crumpled. After, that, I began building up the shoe, simply by placing pieces of tape around the sole, horizontally. In order to achieve the bulb-part of the heel, the upper piece of tape was cut into slits, and bent outwards, secured by tape. Another piece of tape was bent inwards and the slits on the tape was secured together, getting the final shape. The toe box(front of the shoe) assisted in the lift of the toe. Ib was a very simple look to achieve. the two end s of the tape were bent back and taped to the top of the sole creating a loop, where the adhesive was covered by another strip, this was repeated until the entire toe bow was completed. For the top of the shoe, which appears as 3 roll-shaped pieces layered together, I did just that by pressing small pieces of tape into separate pieces and lining them on a piece of tape, then folding the piece of tape over. As I had to tape the 3 rolls (piece upon piece), they lost their shape, an awl was used to indent into the space between each attached roll. for the suede detailing, tape was again layer into a 'y' shape and 'U' shape. A small awl was used to poked (detail) holes in the sides.
     The second shoe had much improvement from the first. The basic shape of the shoe was much cleaner, and understanding what can have (negative or positive) effects on the adhesion of the tape helped me proficiently and thus efficiently construct the partner shoe. An example: on the first shoe, I used Mod Podge to get the shiny look that the actual shoe's metallic fabric has. Upon *attempting* to attach the pieces which resemble the suede panels on the shoe, they would not adhere permanently to the side. I overcame his with a fresh piece of tape with better bond- since it hadn't been on the cutting mat. Another problem I had was getting the shoe laces through the grommets.The small awl was used at first because the shoe has very small holes.but because of the difficulty that was presented when trying to lace the shoes, a hole punch was used much later. Due to the design of the shoe laces being much wider than most other shoes, aglets were added to make it easier to feed through the holes.
     Overall, it was very challenging to create a pair, because once you know what works and doesn't work, its very hard to apply that to the second shoe, without making it look drastically different. Such as certain pointers were discarded because they couldn't be applied to the first (finished) shoe, and applying them could possibly change the form of the shoe or somehow alter the viewers final perception of the piece. Its important to use 1-tone or no-tone (as in my case, Mod Podge) materials to recreate apparel. This project showed me that I didn't know as much about a shoes structure as I thought.


Thursday, July 30, 2015

Experience @ the CMA


I chose the Cleveland Museum of Art for my museum visit assignment. This was mainly because I had just happened to be in Cleveland the next week after the start of summer vacation for a 5K. Believe me, I did not want to be in Cleveland for longer than I had to be. I originally had my plans set up to hang out with friends, and was frustrated when I had to leave early and be… stuck in Cleveland. But I saw my chance to get this all done with, and we decided to make a day out of it.
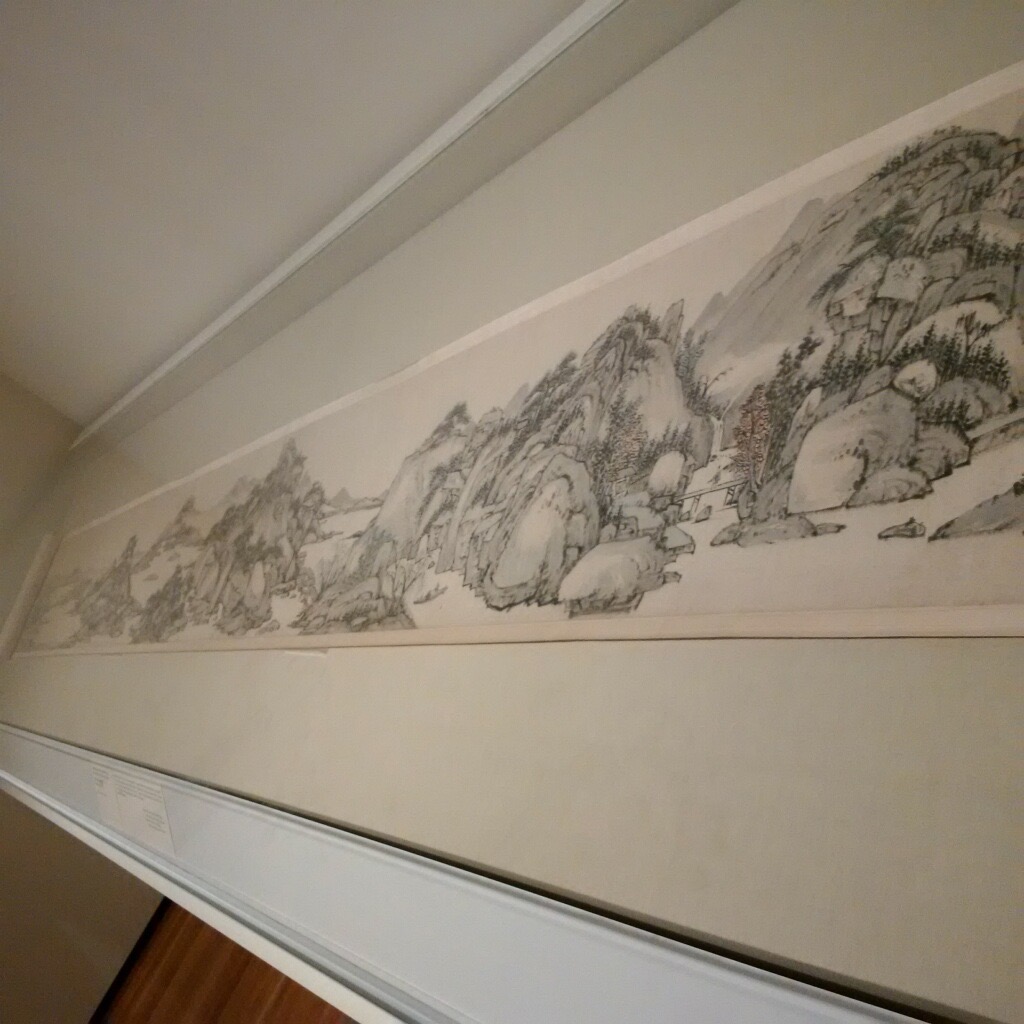
            I primarily chose an exhibit named Gold of the Ancient Americas, but found myself wandering into other exhibits, which wove into that hall, such as Tantra in Buddhist Art, which was so beautiful. I was so distracted with all the intricate detail and how it lasted for so many centuries. These came from India, China, etc. and included statues, printed textiles, and pages from books. These pages included translations, which revealed they were mostly ancient (bedtime) stories and tales.
            But back to Gold of The Ancient Americas, which included golden figures, emblems, and containers (tea pots, candle holders, plates/bowls, etc.). These came mainly from the “Central Andes (today mainly Peru) and the Isthmus Region (now Costa Rica, Panama, and Colombia)”. This was a short exhibit with about a dozen pieces on display.  Near the end of my visit, I wandered through an exhibit with Native American works, including masks from celebratory and tribal costumes, as well as oars, statues, among other things.

            I think it would’ve been cool to do the Greek and European art exhibits, with all the paintings’ floral and peachy color palettes and ornamental marble statues, as well as shell trim wood furniture. I’ve always been attracted to those characteristics, mainly because I’ve grown up with adornments in my house very similar. But it was good for me to get out of my comfort zone, especially when it comes to art, because almost everything new I try goes fortunately well.

Photos from my visit to The Cleveland Museum of Art
__________________________________________
(I took so many more photos than what is posted, but i had to put a filter on them all. these are my favorites and the ones i enjoyed in the majority)